
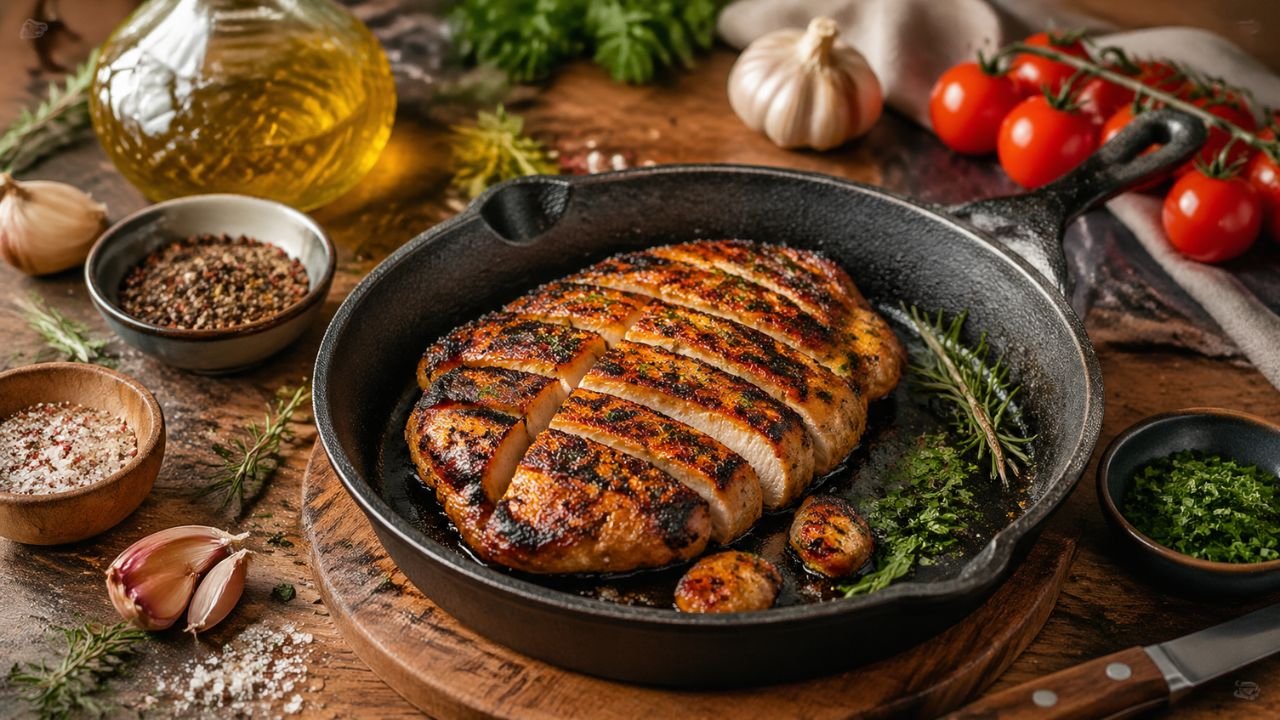
There is a particular pleasure in cutting into a well-cooked chicken steak: the lightly crisped edges, the burnished surface, the tender interior that releases a quiet ribbon of juice onto the plate. This grilled chicken steak brings that restaurant-style finish into the home kitchen without requiring an outdoor grill, heavy equipment, or a long marinade. The secret is a hot pan, a thin gloss of oil, and the discipline to let the chicken sear before moving it.
In a professional kitchen, color is flavor. Those golden, slightly charred edges do not happen by accident; they come from direct heat, a dry surface, and even contact with the pan. Here, the chicken breast is lightly flattened so it cooks quickly and evenly, then seasoned with garlic, smoked paprika, lemon, black pepper, and a touch of butter at the end. The result is clean, savory, and deeply satisfying, with enough elegance for a weeknight dinner that still feels composed.

This is the sort of dish I like to serve when time is short but standards are not. It works beautifully beside a crisp salad, roasted vegetables, mashed potatoes, or warm flatbread. The pan technique gives you those delicious, defined edges in under 20 minutes of active cooking, making this grilled chicken steak both practical and polished.
 Gâteau aux pommes moelleux : ma recette ultra rapide prête en un rien de temps, et vraiment facile
Recipe Information
- Recipe Name: Grilled Chicken Steak
- Description: A tender, pan-grilled chicken steak with restaurant-style seared edges, bright lemon-garlic seasoning, and a buttery finish.
- Servings: 2 servings
- Preparation Time: 8 minutes
- Cooking Time: 11 minutes
- Total Time: 19 minutes
- Resting Time: 3 minutes
- Difficulty: Easy
- Recipe Category: Main Course
- Cuisine: Modern European-inspired
Ingredients
For the chicken steak
- 2 boneless, skinless chicken breasts, about 180 to 200 g each
- 1 tablespoon olive oil
- 1 teaspoon fresh lemon juice
- 1 teaspoon Dijon mustard
- 1 garlic clove, finely grated
- 1 teaspoon smoked paprika
- 1/2 teaspoon dried oregano
- 1/2 teaspoon fine sea salt, plus more to taste
- 1/4 teaspoon freshly ground black pepper
- 1/4 teaspoon chili flakes, optional
For finishing the pan
- 1 teaspoon neutral oil, for searing
- 1 tablespoon unsalted butter
- 1 small sprig rosemary or thyme
- 1 teaspoon lemon zest
- 1 tablespoon chopped parsley
For serving
- Lemon wedges
- A handful of dressed greens, grilled vegetables, or mashed potatoes
- A little flaky salt, optional
Kitchen Tools
- Heavy skillet, cast-iron pan, or grill pan
- Sharp knife
- Meat mallet or rolling pin
- Mixing bowl
- Tongs
- Instant-read thermometer, optional but useful
- Small plate for resting
Preparation
Preparing the chicken
- Even thickness: Place each chicken breast between two sheets of parchment paper or inside a food-safe bag. Gently pound the thicker end until the chicken is about 1.5 cm thick throughout. This is one of the most important details in the recipe, because even thickness means the surface can brown beautifully while the center cooks without drying out.
- Pat the chicken very dry with kitchen paper. Moisture on the surface turns into steam, and steam prevents the crisp, bronzed edges that make a pan-grilled chicken steak taste so much like one served in a restaurant.
- In a bowl, combine the olive oil, lemon juice, Dijon mustard, grated garlic, smoked paprika, oregano, salt, black pepper, and chili flakes if using. Coat the chicken evenly in this mixture, pressing the seasoning onto both sides. There is no need for a long marinade; a few minutes while the pan heats is enough for this quick method.
The one-pan searing trick
- Set a heavy skillet or cast-iron pan over medium-high heat for 2 to 3 minutes. The pan must be properly hot before the chicken goes in. A lukewarm pan will give you pale chicken and watery juices, while a hot pan gives immediate contact and strong color.
- Add the neutral oil and swirl it across the surface. Lay the chicken into the pan away from you, leaving space between the pieces. Press each piece gently with tongs for the first 10 seconds so the edges and center make full contact with the metal.
- Important: Do not move the chicken for the first 3 to 4 minutes. This stillness is the trick. The seasoning, oil, and dry chicken surface form a deeply golden crust, and the edges begin to catch in the heat. When the underside releases naturally from the pan, it is ready to turn.
- Flip the chicken and cook for another 3 to 4 minutes on the second side. If the pieces are slightly thicker, reduce the heat to medium after flipping so the outside does not darken too quickly before the center is cooked.
Finishing with butter and herbs
- Add the butter, rosemary or thyme, and lemon zest to the pan. As the butter melts and foams, tilt the pan slightly and spoon the aromatic butter over the chicken for 30 to 45 seconds. This gives the surface a glossy finish and softens the sharpness of the garlic and paprika.
- Texture check: The chicken is ready when it feels firm but not hard, and the thickest part reaches 74°C on an instant-read thermometer. Without a thermometer, cut into the thickest section; the juices should run clear and the flesh should be opaque but still moist.
- Transfer the chicken to a plate and rest for 3 minutes. Resting time is not included in the total time, but it matters. It allows the juices to settle, so the steak slices cleanly and remains tender.
- Scatter with chopped parsley and a small pinch of flaky salt just before serving. Spoon any buttery pan juices over the top for a final layer of flavor.
Serving Suggestions
Serve this grilled chicken steak while it is warm, sliced slightly on the diagonal so the interior looks juicy and the seared edges remain visible. For a light plate, pair it with peppery arugula, cucumber ribbons, cherry tomatoes, and a lemon vinaigrette. For something more comforting, serve it over creamy mashed potatoes, herbed rice, or roasted baby potatoes that can catch the pan juices.
The dish also works beautifully in a composed dinner plate: chicken in the center, vegetables to one side, and a small spoonful of sauce or yogurt dressing on the other. A squeeze of lemon at the table brightens the butter and paprika, keeping the finish fresh rather than heavy. For a casual lunch, tuck thin slices into warm pita with lettuce, pickled onions, and garlic yogurt.
Chef Tips
Start with a dry surface
The difference between a pale chicken breast and a deeply seared chicken steak often comes down to surface moisture. Always pat the chicken dry before seasoning. The pan can only create those restaurant-style edges when it is searing, not steaming.
Use the right pan
A cast-iron skillet is ideal because it holds heat beautifully, but any heavy-bottomed pan will work. A thin pan tends to lose heat as soon as the chicken is added, which can prevent browning. Heat the pan before adding oil, and let the oil shimmer before the chicken goes in.
Do not overcrowd
If your pan is small, cook the chicken in batches. Crowding traps steam between the pieces and softens the edges. Space allows the heat to circulate and keeps the seasoning crisp and fragrant.

Balance color with tenderness
Good searing is about confidence, not aggression. Medium-high heat gives color quickly, but if the chicken is thick, lower the heat after the first flip. This protects the crust while giving the center time to cook gently.
Storage and Make-Ahead Tips
Leftover grilled chicken steak can be cooled and stored in an airtight container in the refrigerator for up to 3 days. Slice it only when needed; whole pieces retain moisture better than pre-cut slices. Reheat gently in a covered pan over low heat with a teaspoon of water or broth, just until warmed through. Avoid prolonged reheating, as chicken breast can become dry.
For make-ahead preparation, the chicken can be flattened and coated in the seasoning mixture up to 6 hours in advance. Keep it covered in the refrigerator, then remove it 10 minutes before cooking so it is not icy cold when it meets the pan. The butter and herb finish should always be done fresh, as that final gloss is part of the dish’s charm.
Additional Information
Although the phrase “chicken steak” is used differently across many kitchens, it generally refers to a boneless cut of chicken prepared with the same attention one might give to a steak: even thickness, strong seasoning, high heat, and a well-developed exterior. In restaurant cooking, the pleasure often comes from contrast: a savory crust against a tender center, bright acidity against warm fat, and herbs added at the final moment so their fragrance remains vivid.
This recipe borrows from that professional rhythm but keeps the method accessible. The one-pan approach is economical, quick, and full of flavor because nothing is wasted. The browned seasoning, garlic, butter, lemon zest, and herbs all remain in the same pan, building a simple finishing glaze around the chicken. It is a reminder that refined cooking does not always require elaborate technique. Sometimes, it is simply a matter of heat, patience, and knowing when to leave the chicken alone.
